Yes..the much talked about, highly requested 2D feature is finally here and available to you all for free. In preparation for the Unity 4.3 release, I developed a small 2D physics puzzle game which enabled me to get up to speed with the toolset and also use for demo / presentation purposes on my travels.
This post will go through some of the new 2D tools, workflows and shed a little light on how to use the different features available.
2D Defaults
First new feature is the 2D defaults option in the project wizard, this sets up the unity engine to use 2D for defaults on things such as the texture importer, textures will now be imported as sprites automatically instead of needing to change the texture type in the asset importer.
![]()
There are other subtle touches with using 2D defaults, such as the main camera setup as orthographic and not perspective.
A new addition to the scene window is a little toggle button which if clicked on toggles the scene between 2D and 3D, using 2D defaults means the scene view will have 2D toggled by default without needing to click the button on launch, navigating the scene in the x and y axis only. Also note, creating a new project with 2D defaults enabled doesn’t mean you’re now bound to 2D, all 3D and 2D features are still available.
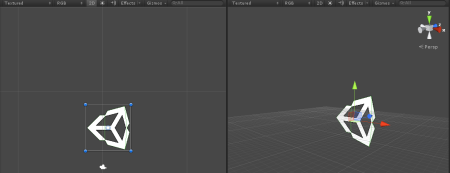
In the 2D viewport in the scene view, with the move tool and the sprite selected we now have a new gizmo to play with, this makes it a lot easier to do actions such as: move, uniform / linear scaling, rotation and highlights the pivot placement. We do not need to switch between different tools, it’s all there in one place.
![]()
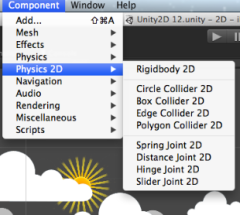
Box2D Physics Integration
Implemented is the Box2D physics engine, a free open source 2-dimensional physics engine and is considered a leading industry standard. With Unity 4.3 we now have a list of new 2D physics components:
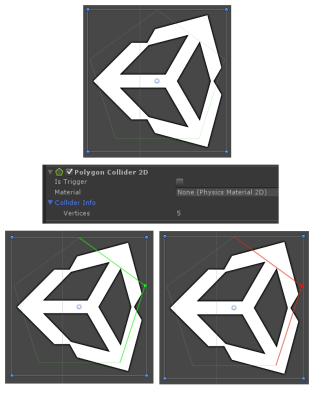
3 / 4 of the colliders are self explanatory but the more interesting one to look at closer is the Polygon collider.
Add the component to your sprite asset in the same way you would add any component and you will see a green highlighted collider outline, the green lines indicate it’s a collider and it should roughly match the shape of your sprite.
If you added the Polygon Collider to an empty GameObject a Pentagon shape will be generated, If you expand the “collider info” in the component you will see the value of 5 Vertices, a Pentagon is made of 5 points therefore 5 Vertices.
To add more Vertices hold down shift + left mouse button anywhere on the green collider line and then position your Vertices, to delete Vertices use ctrl + left mouse click in the same fashion as adding them, you will see the green collider line update to red to indicate delete is available:
The Sprite Editor
There’s a new window to edit sprites in, it’s called the Sprite Editor and can be opened in two ways, Window -> Sprite editor, or click on the sprite asset in the project window, in the inspector change sprite mode to “multiple” and click the Sprite Editor button.
![]()
Note: You need to change the sprite mode to multiple to be able to slice it up in the Sprite Editor.
Let’s take a look at the Slice menu, this will give you options to slice up different elements of your sprite image automatically or manually.
A typical workflow is to slice up the image manually, you can do that by clicking and dragging on the image, you should see a blue rectangular gizmo appear with handles in the corners allowing you to resize your slice area. Having positioned and resized your slice area you can add another by following the same action, and you can add as many as you like. You will also notice a new Sprite window appear giving you extra tools to play with, you can rename the area for that sprite slice and edit the size of the rectangle by coordinates. The Trim button will tightly pack the slice rectangle based on transparency, so it will fit nicely along the edges of the sprite image.
In many cases you can probably use the automatic slicing, Unity will do the work for you and therefore save some time. Using the Automatic slicing option, the Sprite Editor will guess the boundaries of the sprite _again_ by transparency.
The Grid is another slicing option available, very useful for rectangular sprites, the Pixel Size means you can define the height and width of the tiles in pixels.
After automatic slicing you can still edit the slices manually, also use the Trim button to tighten them up.
Lot’s of other cool stuff included such as using the Animation window to easily animate sprites, using Mecanim for 2D blendtrees but I won’t cover that right now.
To finish up here’s some useful info:
Box2D Performance tips:
- Try to avoid a lot of OnCollisionStay callbacks, this will be expensive.
- Profiler is your friend, scroll down in the Profiler to Profile Physics2D and profile early in your development cycle.
- Using the Polygon Collider can be expensive if lot’s of Vertices are needed, Polygon Collider decomposes the Sprite into lot’s of shapes which has a huge overhead.
- Each shape can produce up to two contact points, having a Sprite with 50-80 shapes then it could produce double that in contacts.
- Keep an eye on the amount of contacts from dynamic bodies, if they don’t collide you can have hundreds maybe thousands moving around, when they come into proximity performance starts to crumble
- Circle Collider is your friend.
- Consider all of the above especially when targeting low-end mobile hardware
That’s all folks!
